Thank you for your feedback!
We will contact you shortly
Free consultation
Enter your phone number and we will call you back for a consultation on any moving and storage services
Essential Office Equipment Moving Steps for Smooth Relocation
The challenge of moving an entire office in a busy American city often comes down to one detail: keeping your team productive while every computer, printer, and filing cabinet makes it to the new location safely. For office managers, the smallest equipment mistake can cause costly delays and stress. By focusing on a **thorough office equipment inventory** and smarter packing strategies from the start, you set the stage for a move that is organized, efficient, and minimizes downtime.

The challenge of moving an entire office in a busy American city often comes down to one detail: keeping your team productive while every computer, printer, and filing cabinet makes it to the new location safely. For office managers, the smallest equipment mistake can cause costly delays and stress. By focusing on a thorough office equipment inventory and smarter packing strategies from the start, you set the stage for a move that is organized, efficient, and minimizes downtime.
Step 1: Assess all office equipment and create an inventory
Before you can move anything, you need to know exactly what you're moving. This step establishes your baseline, giving you a complete picture of your office equipment while creating a document you'll rely on throughout the entire relocation process. You'll walk away with a detailed record that tracks every item, its condition, and its location, which prevents costly mistakes and unnecessary purchases down the road.
Start by doing a physical walkthrough of your entire office space. Grab a notepad, tablet, or spreadsheet and systematically visit each department, room, and storage area. For every piece of equipment you find, document the item name, quantity, purchase date if you can access it, current condition, and its location. This might feel tedious when you're cataloging your fifth desk, but you're building something valuable here. According to inventory management best practices, this documentation helps organizations track equipment usage, identify replacement needs, and reduce unnecessary spending. As you move through your space, pay special attention to equipment that's moved before or shows wear. A monitor with a cracked corner will need different handling than a pristine one. Note peripherals too. Your equipment inventory should capture the full picture—computers, monitors, keyboards, printers, filing cabinets, office furniture, specialized machinery, and anything else your team uses daily.
Once you've completed your walkthrough, organize your findings into a comprehensive template. A detailed equipment inventory typically includes descriptions, quantities, locations, purchase dates, and condition assessments. Digital templates work better than handwritten notes because you can easily share them with your moving coordinator at Star Van Lines Movers, update them as conditions change, and reference them during the actual move. Assign each item a unique identifier or location code (like "3rd floor, east side, cubicle 12") so your moving team knows exactly where everything needs to go in your new space. This inventory becomes your roadmap. It ensures availability of necessary items at your new location, prevents you from accidentally leaving behind critical equipment, and helps your moving team prioritize what needs special handling. The time you invest now pays dividends when moving day arrives and your team knows precisely what's being relocated and where it belongs.
Here's a summary of key office equipment inventory attributes and their impact on a successful move:
| Attribute | Purpose | Impact on Move |
|---|---|---|
| Item Name | Identifies each asset | Avoids relocation errors |
| Quantity | Tracks available units | Ensures supply sufficiency |
| Condition | Notes wear or damage | Guides special handling |
| Location | Specifies item origin | Improves load logistics |
| Purchase Date | Assesses replacement timelines | Informs upgrade decisions |
| Unique Identifier | Links items with inventory records | Streamlines tracking |
Step 2: Plan packing methods and gather proper materials
Now that you know what you're moving, it's time to decide how to protect it during transit. Planning your packing strategy and collecting the right materials upfront prevents damage, saves money on replacements, and keeps your relocation timeline on track. The materials you choose and methods you use make the difference between equipment arriving in pristine condition and dealing with costly repairs or replacements at your new location.
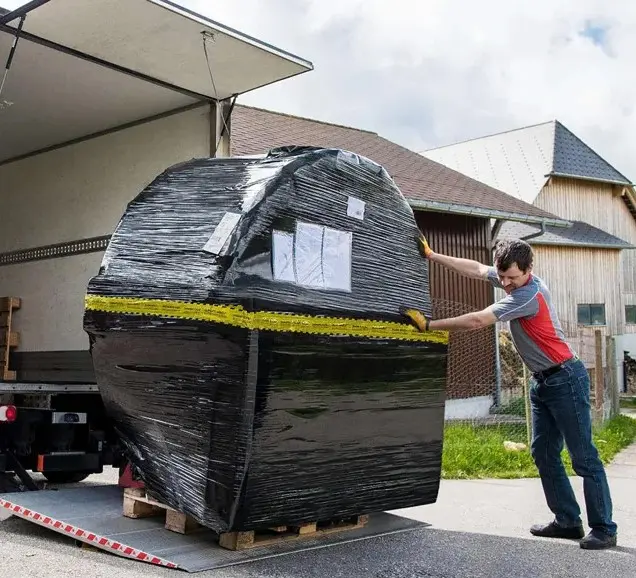
Start by categorizing your equipment based on fragility and value. Servers, computers, and monitors require more protection than filing cabinets or desk chairs. For sensitive electronics, you'll want sturdy boxes with adequate cushioning inside. Proper packing involves gently handling items to avoid damage, selecting appropriate containers, and using cushioning materials like foam, bubble wrap, or padded blankets to minimize bruising or breakage during packing and transport. Think about the journey your equipment will take from your current office through loading, transport, and unloading at your new location. Every bump, vibration, and temperature shift poses a potential threat. Packaging materials must be strong enough to withstand normal transport stresses including vibration, temperature changes, and pressure shifts. For items with moving parts or delicate components, consider whether original packaging is still available. If you discarded those boxes months ago, invest in high-quality replacement containers now rather than scrambling at the last minute. Visit your local moving supply store or order materials online from companies that specialize in office equipment relocation. You'll need boxes of various sizes, packing tape, bubble wrap, foam sheets, packing paper, and protective blankets for larger items. Having these materials on hand prevents the rush and frustration of realizing you're short on supplies when you've already started packing.
Create a simple packing plan for different equipment categories. Computers should be wrapped individually, with cables bundled and labeled so you know what connects where at your new location. Monitors need corner protection and cushioning around all sides. Printers and copiers benefit from protective covers that come from the manufacturer if available, or heavy blankets if not. Filing cabinets can be taped shut to prevent drawers from opening during transport, but ensure nothing shifts inside. When packing items with liquids or toner, leave sufficient headspace to prevent leakage or distortion due to expansion during transport. Document your packing methods as you go. Take photos of how cables were connected before disconnection, note which items require special handling, and communicate these details to your moving team at Star Van Lines Movers. This preparation transforms moving day from chaotic to coordinated.
Compare how packing materials protect different types of office equipment:
| Material | Best for | Protection Provided |
|---|---|---|
| Bubble Wrap | Monitors, electronics | Excellent shock absorption |
| Foam Sheets | Servers, fragile parts | Prevents vibration damage |
| Packing Paper | Small peripherals | Prevents surface scratches |
| Blankets | Large furniture | Shields from impact and dust |
Step 3: Label equipment and prepare items for safe handling
Clear labeling transforms your move from a guessing game into an organized operation. This step ensures that your moving team understands what they're handling, where it goes, and what special care it requires. When every item is properly labeled with its contents, destination, and handling instructions, you eliminate confusion on moving day and protect your equipment from damage caused by improper handling.
Start with a comprehensive labeling system that works for your entire office. Every box and piece of equipment needs at least three pieces of information. The contents of the box matter, but so does where it's going in your new space and how to handle it during transport. Use large, legible labels that your moving crew can read from several feet away without stopping to squint. Consider using a standardized format like a color coding system where red labels mean fragile electronics, yellow means heavy items that need multiple people, and green indicates standard office furniture. Include handling instructions on items that need special attention. For computer monitors and servers, write "Fragile Electronics" prominently. For printers with toner cartridges that could leak, add "No Tipping" and "Keep Upright." If any equipment contains hazardous materials like printer toner or cleaning supplies, labeling becomes even more critical. Clear and standardized labeling with hazard warnings and handling instructions supports safe transport and complies with safety standards. Include the chemical identity and hazard information on secondary containers so your team understands risks and proper handling practices before they even touch the item.
Beyond the labels themselves, prepare items physically for safe handling. Secure all loose cables and cords with velcro straps or clearly labeled plastic bags so nothing dangles or gets tangled during movement. Remove any removable parts from equipment like paper trays from printers or keyboard drawers from desks, and secure them in labeled boxes that travel with the main unit. Take photos of your setup before disconnecting anything. Photograph the back of your computer showing cable connections, the interior of your printer showing toner cartridge location, and any other details that will help you reassemble correctly at your new office. Create a simple reference document that pairs these photos with your equipment inventory. This becomes your reassembly guide when you arrive at your new location. Communicate all of this labeling and preparation work to your moving team at Star Van Lines Movers before they arrive. Share your color coding system, point out items that need extra care, and provide them with your photo documentation. When movers understand your system and your equipment's vulnerabilities, they handle everything with appropriate respect.
Step 4: Coordinate logistics with your moving team
You've done the planning work. Now it's time to align your team with the movers who will execute the relocation. Coordination is what separates a smooth transition from a chaotic scramble on moving day. When your internal staff and your moving team operate from the same playbook, everyone knows their role and timeline, minimizing downtime and protecting your equipment throughout the process.
Start by scheduling a detailed planning meeting with your moving coordinator at least two weeks before the scheduled move date. Bring your equipment inventory, packing documentation, and labeling system to this conversation. Walk through your facility together if possible, or provide detailed photos and floor plans if an in-person visit isn't feasible. Logistics coordination involves managing the flow of products through facilities, people, and equipment to ensure successful delivery, and this meeting establishes how your relocation will actually work. Discuss the specific date and time window for the move, the number of movers you'll need, truck size requirements, and any access limitations at either your current or new location. Talk about parking constraints, elevator reservations, stairwell widths, and door frame sizes that might affect how large items are moved. Address your special handling requirements here. If you have sensitive servers or expensive equipment, discuss how those will be protected. If you need to maintain continuous operation in certain departments, map out the sequence of disconnection and reconnection. Ask your mover about their experience with commercial office relocations and whether they've handled equipment similar to yours before. Logistics assessment requires evaluating transport infrastructure, determining vehicle needs, and contracting appropriate services, and your mover should demonstrate expertise in these areas.
Create a detailed move day timeline and share it with your entire office staff. Establish who will be present on moving day and what their responsibilities are. Designate someone from your team as the primary contact and decision-maker during the move. This person should have authority to answer questions, make quick decisions if issues arise, and communicate with the moving crew. Create a walkthrough checklist for after items are loaded to verify nothing was left behind. Establish a system for tracking which equipment boxes are loaded onto which truck and in what order, so you know what arrives when at your new location. Confirm all details in writing one week before the move. Reconfirm the date, time, entry instructions for your new building, parking information, and any changes to your room assignments or office layout. Provide the moving team with contact numbers for key personnel on both the old and new locations. Establish a communication protocol for if something goes wrong during transport or delivery. Collaboration among team members ensures smooth operations during moves, and your preparation creates the conditions for that collaboration to succeed.
Step 5: Verify safe transport and test equipment functionality
Moving day is over and your equipment has arrived at your new location. Now comes the critical phase where you confirm that everything made the journey safely and functions exactly as it did before. This step protects you from silent damage that only appears when you try to use equipment and ensures you catch any issues while your moving company's insurance still covers claims.
Before your movers leave, conduct a thorough walkthrough of everything that arrived. Check boxes against your inventory list to verify that nothing was left behind at your old location. Inspect visible packaging for signs of impact, water damage, or shifting. Open boxes containing fragile items and examine equipment for obvious physical damage. Look for cracked screens, bent frames, dented metal housings, or any external signs that items experienced rough handling during transport. Document any damage with photos immediately, while movers are still present and can note conditions on the bill of lading. This creates an official record if you need to file an insurance claim later. Once you've verified that everything arrived, the next phase involves systematic testing. Verification ensures that equipment meets design specifications through testing and inspection, confirming it functions as intended after transport and installation. Start with basic connectivity tests. Plug computers into power and verify they boot normally. Connect monitors and check that displays show properly without flickering or discoloration. Test printers by printing a test page and examining output quality. Run a quick copy test on copiers to confirm they're functioning. Check that all peripherals like keyboards, mice, and external drives respond correctly. This isn't about deep technical diagnostics yet. You're simply confirming that power delivery works and basic functionality operates.
After basic connectivity testing, move to functional validation where you confirm equipment fulfills its intended purpose. Have staff members in each department test their specific tools. Accountants should verify that their accounting software accesses files correctly. Marketing teams should confirm design software loads properly and files open without corruption. IT staff should run network diagnostics to ensure servers are communicating and data integrity is intact. Test printers with various paper sizes and settings to confirm they handle your typical workflow. Make phone lines and video conferencing equipment and confirm audio and video quality. Create a testing checklist organized by department that documents what was tested, who tested it, and any issues that emerged. This becomes your record of equipment condition at your new location and provides a baseline if problems develop later. If you discover damage or functionality issues during testing, photograph the problems and contact Star Van Lines Movers immediately. Most companies have specific timeframes for filing damage claims, and prompt reporting ensures you meet those deadlines. Keep all documentation including photos, inventory lists, testing results, and any communication with your moving company organized in a file for your records.
Ensure a Flawless Office Equipment Move with Expert Support
Moving office equipment is a complex challenge that requires meticulous inventory tracking, careful packing, and coordinated logistics to avoid costly damage and delays. If you want to eliminate the stress of managing fragile electronics and bulky furniture during your relocation, partnering with professionals is key. At Star Van Lines Movers, we specialize in secure, insured commercial moves that protect every item on your carefully prepared inventory and handle your equipment with the respect it deserves.
From providing the right packing materials to seamless coordination with your team, our experienced movers ensure your office assets arrive safely and are tested for full functionality at your new location. With punctual service and comprehensive insurance coverage, you can trust us to make your transition smooth and efficient.
Take the next step toward a worry-free office relocation. Visit Star Van Lines Movers now to get a quick moving cost estimate, schedule your free consultation, and discover why countless businesses choose us for reliable, professional moving solutions. Don’t leave your vital office equipment to chance ensure a flawless move with experts on your side.
Explore our detailed resources and services at Star Van Lines Movers to start planning your perfect office move today.
Frequently Asked Questions
What steps should I take to create an inventory of my office equipment before moving?
To create an inventory, start by physically walking through your office. Document each item, including its name, quantity, condition, and location, to ensure a comprehensive record that helps prevent mistakes during the relocation process.
How can I categorize my office equipment for packing?
Categorize your office equipment based on fragility and value. For instance, separate sensitive electronics like servers and monitors from more durable items like filing cabinets, and label them accordingly to ensure proper packing and handling.
What materials do I need for packing my office equipment safely?
You will need various packing materials, including sturdy boxes, bubble wrap, foam sheets, packing tape, and protective blankets. Gather these supplies before you start packing to ensure your equipment is secure during transit and avoid last-minute stress.
How should I label my equipment and boxes to ensure safe transport?
Use large, clear labels that include the contents, destination, and handling instructions for each item. Employ a color-coded system to identify fragile items easily and include special handling notes to prevent damage during transport.
What should I check to verify the functionality of my equipment after moving?
Verify functionality by conducting basic connectivity tests, such as powering on computers and checking displays. Document any issues that arise during testing, and address them promptly to ensure your equipment is ready for use in the new location.
How can I coordinate logistics with my moving team effectively?
Schedule a detailed planning meeting with your moving coordinator to discuss timelines, equipment handling, and access limitations. Create a comprehensive timeline and designate a primary contact person from your team to streamline communication and ensure a smooth moving day.

Artur Shakhnazarov
PR Manager
Love Doing PR for my Company